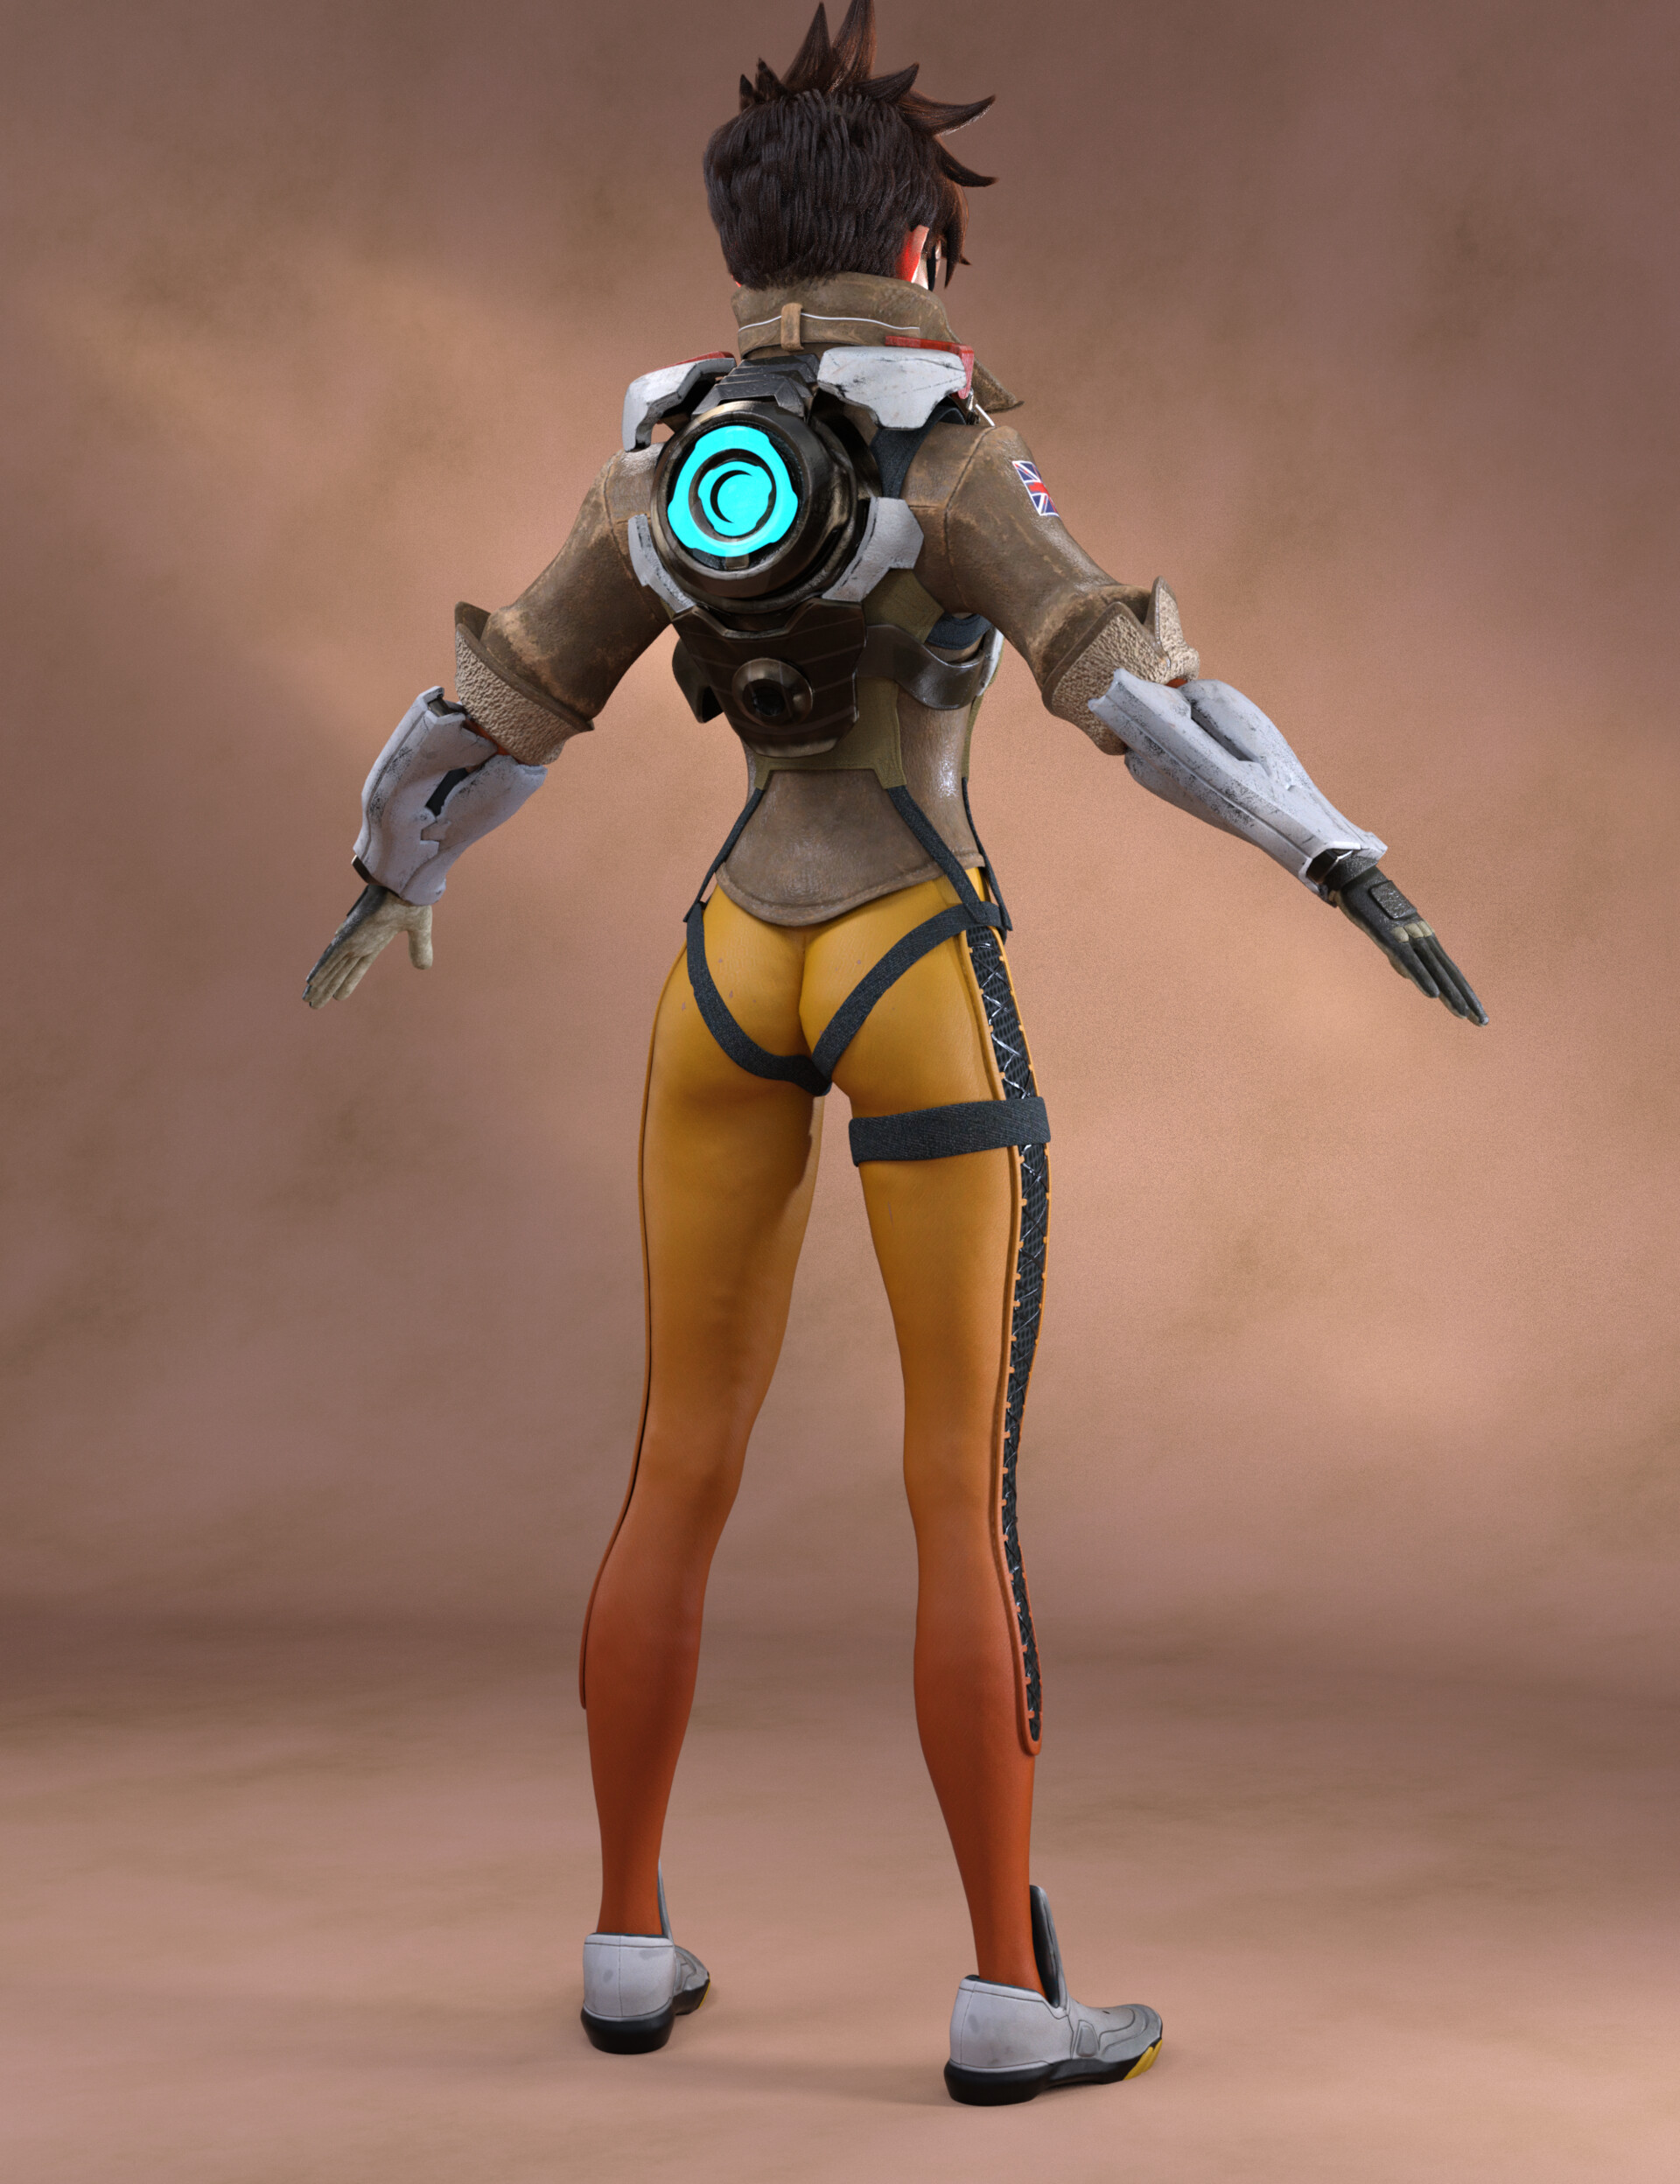
High Detail Tracer Outfit
I had been wanting to do some renders with some of the Overwatch Characters. The thing is, most of the renders are people using ripped game models and the detail isn't all that great. So I set to the task of re-creating a high quality Tracer outfit for the Genesis 8 Figures. I wanted to get as true to the original as possible, while enhancing the look and detail so that it's instantly recognizable but also detailed and beautiful to render.

Final Look

I kept everything in quads because this is made for a production renderer.

As much as possible I tried to capture the details with geometry while keeping the polycount low

This was my first run at Tracer's Jacket textures. It took a few tries to get the weathered look the way I wanted it

There were no high quality details for her chevrons and arm patches --so I had to make my own.

I tried to capture detail with geometry rather than displacement maps and normal maps


The Bracers were easier than I thought, but still challenging


I spent a lot of time on the sneakers so that I could capture the detail from her game model.

The googles were pretty easy, but the hair required a little creative problem solving.

First I converted the hair to a quad mesh, so I could smooth it properly

Using the quad hair mesh, I was able to resize and use it to create spline guides across the surface.

I used maya's new Sweep mesh to turn those splines into strands. I used geometry so that I could work with it across renderers without having to worry about it.

In the back the strands were individualized rather than using flat hair cards. It looks a lot better up close the hair mesh itself is less than 125k polys, so it looks good and doesn't choke Iray.